Overview of custom fields
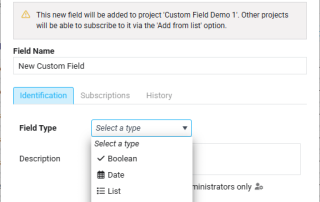
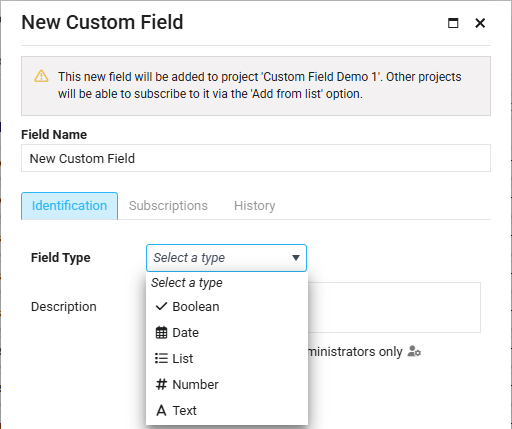
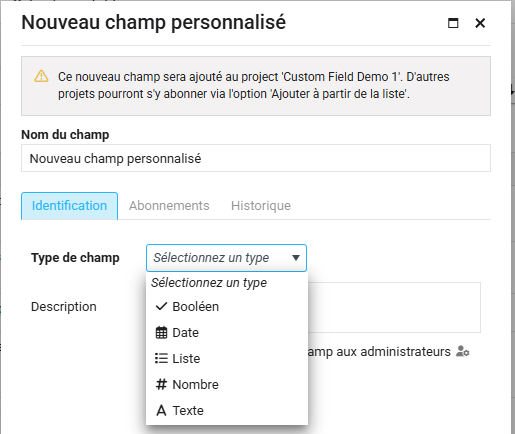
Custom fields, available only in the new interface, allow you to add information to various entities. There are five field types and specific management options for each entity.
Custom fields, available only in the new interface, allow you to add information to various entities. There are five field types and specific management options for each entity.
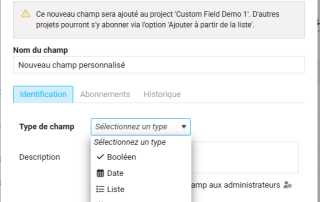
Les champs personnalisés, disponibles uniquement dans la nouvelle interface, permettent d'ajouter des informations à diverses entités. Il existe six types de champs et des options de gestion spécifiques pour chaque entité.
After months of hard work, we are proud to introduce a new way of working with your projects: Project Portfolios.
A portfolio of projects should contain similar projects, sharing the same structure of assigned users, task statuses, groups, types, and priorities. In a portfolio, assigned users have the same access rights for all projects, except if you overwrite them at the project level. When you create a project, you must choose the portfolio to which it belongs.
Récemment, nous avons mis en place une nouvelle notification par courriel pour notifier les utilisateurs qui n’ont pas correctement rempli leurs feuilles de temps. Les retours ont été excellents, et suite à cette fonctionnalité, nous avons décidé de lancer un tableau de bord qui affiche les feuilles de temps correctement ou incorrectement remplies pour les utilisateurs que vous gérez. Ce tableau de bord est en fait un sommaire de la saisie du temps et vous permet de vérifier si l’entrée des heures a été correctement effectuée.
Comment accéder au tableau de bord de saisie du temps ?
Pour ouvrir le table de bord, simplement cliquer sur l’item de menu ci-dessous:
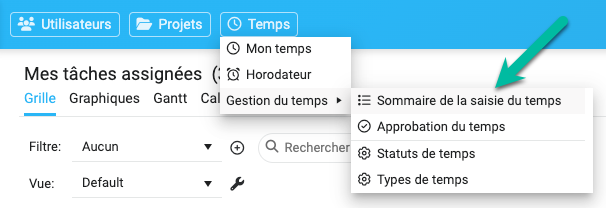
Voici un résumé de ce qu’offre le tableau de bord :
Version française: Sommaire de saisie du temps dans la nouvelle interface
Recently, we released a new email notification to users who have not filled out their timesheets correctly. The feedback has been great, and following this feature, we decided to release a panel that displays timesheets that are filled out correctly or not for the users you manage. This panel allows you to follow up on users’ timesheets and whether the time entry was correctly done.
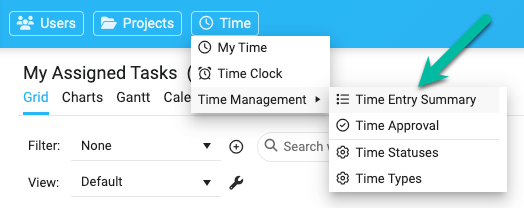
How to access the summary panel?
To open the Time Entry Summary Panel, simply click the menu item below:
Here is a summary of the panel:
We are proud to launch new improvements to our timesheet module. Over the past few years, we have received much feedback on improving our time management processes.
Here is a summary of them:
When you submit your time to someone, […]
You can no longer remove the link between a parent and a child project from the classic interface.
There was incomprehension about the purpose/goal of working with project templates, parents, and child projects. Most people clicked the Remove Link button without knowing they would lose synchronization across their parent/child projects with groups, types, priorities, and statuses.
We want to encourage users to group projects because projects of the same nature should share the same structure (assigned users, groups, types, priorities, statuses).
A new way of working on your parent and child projects will be released soon in the new interface: Project Portfolios.
Actually
After (Coming Soon)
We proudly announce that we made great progress in the new interface. We have completed all project, user, and account management panels. Please login to the New Interface and give it a try.
Here is the list of things you can now do:
Simply click the “New User” menu item at the screen’s top upper left: see the image below. A panel will appear to enter the new user credentials, access rights, email notifications, and other settings.

Before the end of the year, we are glad to launch our latest release of 2022, which includes a new user list panel for AceProject. The next iteration of that panel will allow you to edit the settings for each user, including their project access rights.
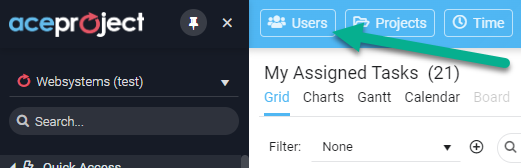
Simply click the “Users” button at the screen’s top upper left: see the image below. Proper access rights are needed: administrators will see all users with all fields (27), while regular users will see a limited number of fields (9).
The user panel allows you to add/remove the columns in the grid by simply clicking the 3-dot menu from any column. You can choose from 27 columns:
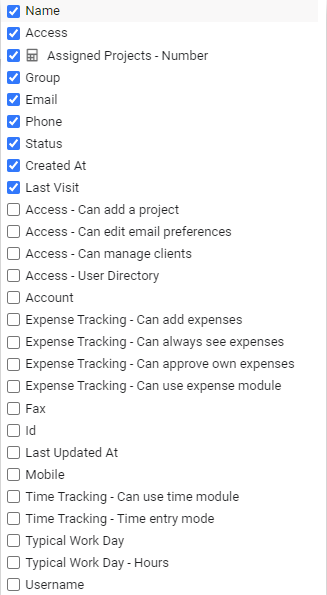
The User List panel offers a lot of flexibility. By default, you see all active users in your account. You can […]
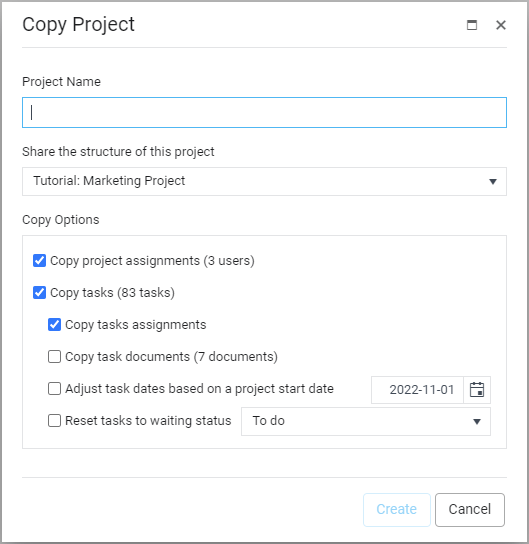
Good News! We just rolled out many new features in the New Interface. When you create a new project from a template, we added some options to also copy tasks and documents.
An administrator can now manage time types and time statuses without going to the classic interface anymore.
Finally, you can see your deleted projects directly from the Project List panel, and restore them easily within the 30-day grace period.
When you create a new project, you have to select a template project to share the structure with. Once the template project is selected, you now have some copy options available below.
Simply click the “Time” button located at the top upper left of the screen, and choose the option your want. You have to be an administrator to access this feature.
