The new interface is still evolving with a panel displaying the list of your projects. This new panel displays all your projects in a comprehensive grid, allowing you to filter, sort, and group your projects with multiple criteria.
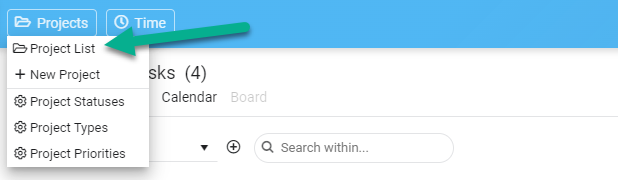
How to open the Project List?
Simply by using the “Projects” button located at the top upper left of the screen, and click the “Project List” item. See the image below:
How to use the Project List panel?
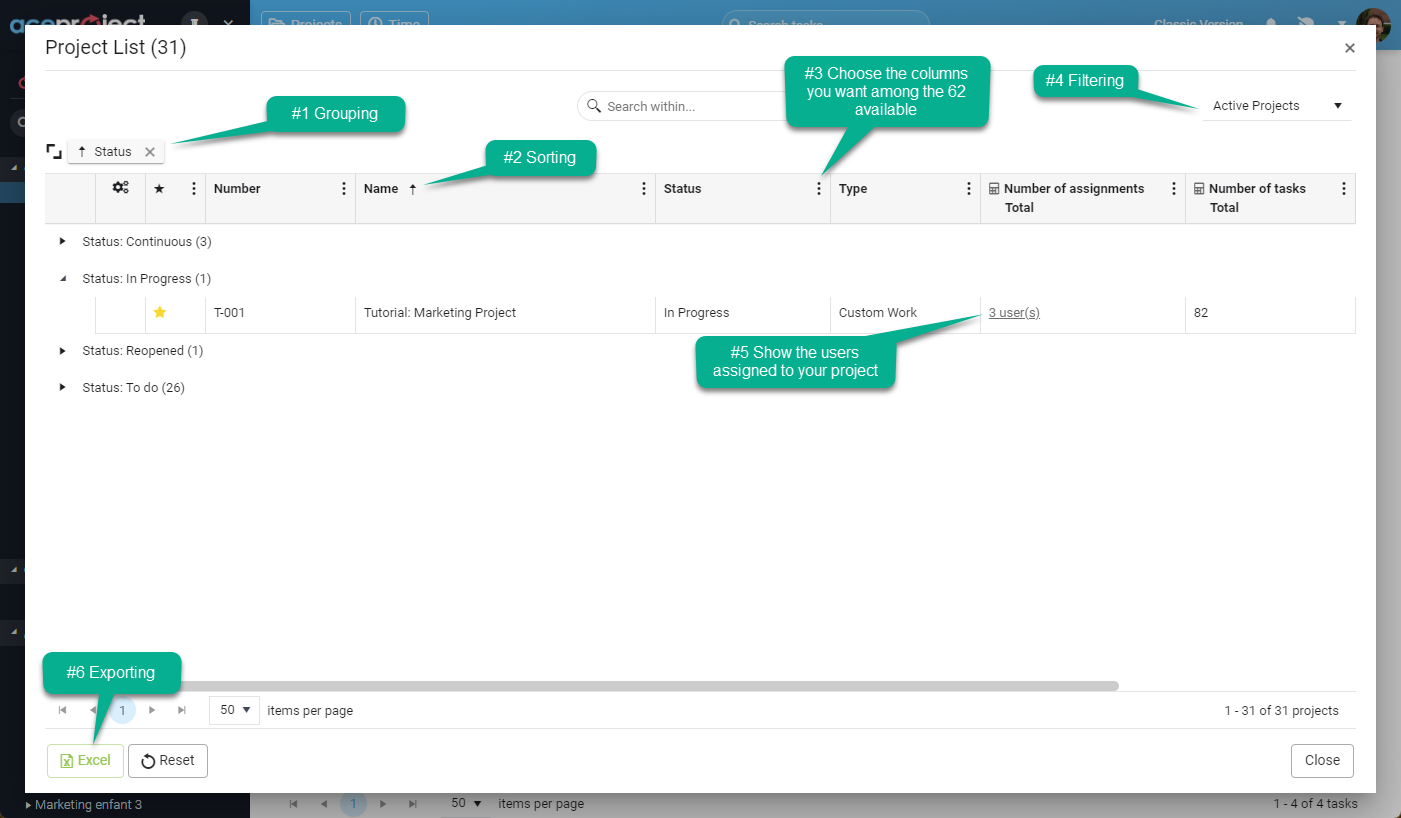
The Project List panel offers a lot of flexibility. First, you see the projects you are assigned to if you are a normal user, and all projects if you are an administrator. If you click any project, it will open the Edit Project panel and allow you to do some modifications.
Moreover, you have the following options available:
#1 Grouping: This feature allows you to group your projects on one or several levels. For example, you can group your projects by Status, then by Type. To activate this feature, simply drag-drop a column above the grid.
#2 Sorting: This feature allows you to sort your projects by clicking on any column. By default, the projects are sorted by name ascending. You can sort by any column by clicking on the header.
#3 Choose your columns: This feature allows you to add/remove the columns in the grid by simply clicking the 3-dot menu for any column. You can choose among 62 columns.
#4 Filtering: This feature allows you to display only your active projects, your completed projects, or all projects.
#5 Show assigned users: This feature allows you to click on a link to display a panel with all assigned users, including their access rights.
#6 Export to Excel: Below the grid, click the Excel button if you want to export all displayed projects to Excel. This will only export the projects with the columns you see in the grid and not the 62 available columns.
Leave A Comment